

Starting the Borland C++ Builder, a new project is created. To set its name we can select the Save all option from the File mený. First of all we'll be asked to write the name we want to use for the basic form's code and the resource files. Writing BasicUnit, C++ Builder will create the files:
Note
If you have already used C++, the first two files will probably sound familiar to you: they are respectively the header file (.h), where class declaration are saved and the file containig the class's code (.cpp). The third file contains form's resources which consist in its visual layout and something more.
Then we'll be asked to chose a name for the project we are working to. Call it Archive. C++ Builder creates the following files:
Project's WorkSpace is now ready. C++ Builder's WorkSpace is the programming enviroment and it's made up by three parts: at the top there is a bar (fig.2.1) containing a mený which holds the visual components (VCL) that developers can use to build their applications. Components are divided, according to thier functionality in Standard, Win95, Additional, Data Access, Data Control, ... . It is possible to make the desidered mený visible by clicking on the corresponding flap. In the same bar there are some buttons whose functions will be explained time by time we'll use them and the classic File, Edit, Search, View, Project, ... mený.

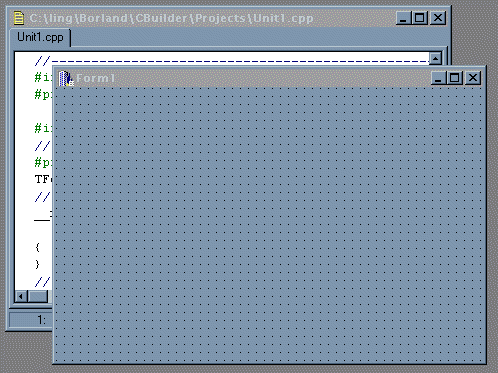
Under this bar are applications' forms. The forms are the windows our project will show at execution time. In the same position is C++ Builder's text editor we'll use to write classes' code (fig.2.2).

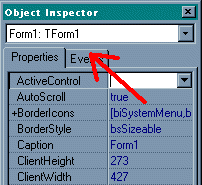
In the forms it is possible to insert components got from the components' mený. Each component, form included, is characterized by a large number of properties, methods and events they generate. On the left side is a window called Object Inspector (fig.2.3) through which selected components' properties and events can be visualized and edited. Acting on the Object Inspector we can set components' properties and handle a particular function to one or more events.

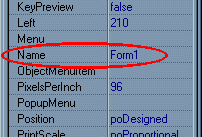
That's the WorkSpace. Now we can begin building Archive's basic form. To set form's name select the form named Form1 (this is the name C++ Builder gives to the form by default) in the Object Inspector's mený (fig.2.4), search the Name property (fig.2.5) and substitute the text Form1 with BasicForm. To change the text shown on window's title bar we have to act on the Caption (fig.2.6) property. Set its value to Archive.


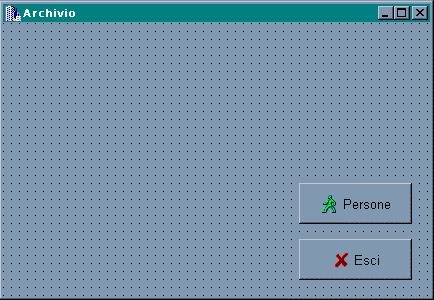
To understand better what we are doing, it is possible to ask to C++ Builder to compile, link and execute the application. Select the Run option in the Run mený or press F9. Some seconds after our programm will be ready and executed. Actually it consists in an empty window named Archive. Not much, but it's already a full-working application. To stop Archive's execution press the crossed button at the top right of the window or use the Program Reset function in the Run mený. We are back to the workspace. Now we'll add some buttons to the window and write the function to call when the buttons are clicked. C++ Builder has different kind of buttons. We'll use the TBitBtn buttons which can be found in the Additional mený (fig.2.7).


If everything works correctly you can read the following chapter in wich we'll build a new form to display/edit/add data in Persons.DB table.